Changing Your Permalinks Structure.
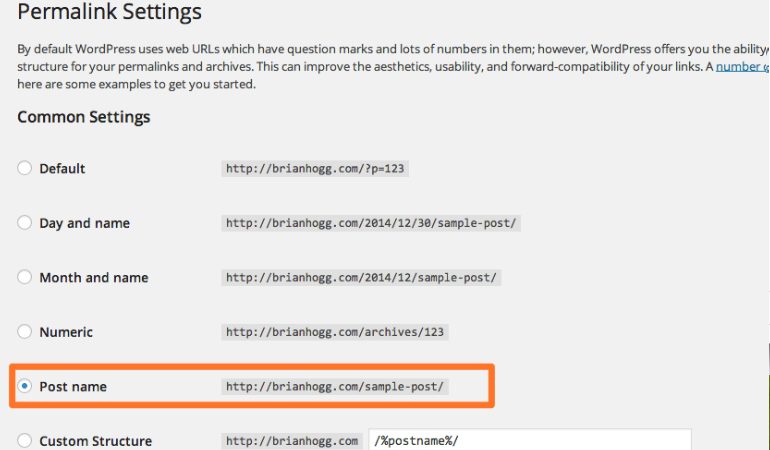
In the specific video, I’m going to show you how to change your Permalinks structure. Now if you have no idea what I’m talking about, don’t worry. I will show you how it works and give you an example of that and then I’m going to show you how to do it. Permalinks basically makes your site URLs more search engine friendly. If Google came to the site and they saw ?p=6 , they are going to think “Ok, What in the world is this site all about?” Now it can obviously look at your post however if you have links that have the keyword title inside the link, then that that’s makes it even more search engine friendly. So your goal is to make it look like this “funnytshirts2/green–medium-size-funny-tees” So how do we make it look like this? Well Simple. By using Permalinks. So if you go back to your Dashboard, and under Settings, Click on Permalinks you can do that. Now the good thing about the latest version 3.4 is that this is our goal here. This is what we want. We want “Postname”. You simply need to check this and click on Save Changes. Now depending on you know your web hosting, if you have just set up your WordPress blog, then you may notice a message that says : You should update your .htaccess now. What that means is that it hasn’t actually updated the .htaccess file and down here it says “if your .htaccess file were writable we can do this automatically” but it is not. So we have to do one more step to make this work. So how we do that? Simple.
What you need to do is first, Go to Filezilla, your FTP program, and log into it. Then go to the folder where your WordPress files are located and up at the very top then Click on “Server” and make sure that this is checked “Force showing hidden files” so that the .htaccess file that is a hidden file shows up. If this is not checked, then you will not see it. Now you should be in the main folder, and if you see the .htaccess file, I want you hold on for just a minute because for those of you that don’t have a .htaccess file, I’m going to show you how to create it. So all we need to do is simply go to File Manager (on your computer), Right-click, Click new text document, and simply drag this text document over to the files of location. Then right-click on the file, click on rename, and rename this as “.htaccess”. Ok, so now that you have a .htaccess file, and if you have one it’s time to go to the next step. The next step that you need to take is to right-click on it click on file permissions, replace 644 with 777 (or 755) and click on OK. Now go back to your WordPress dashboard, Make sure PostName is checked, Click on the Save changes and as you can see successfully your Permalinks structure has been updated.